Online invitations save on printing and postage, reach guests wherever they are, and collect RSVPs for you. No more chasing replies by text.
Here’s when to send each one, what to include, and how to send them by email or WhatsApp from Your Wedding HQ.
Wedding HQ ProThe Wedding HQ steps in this guide need Wedding HQ Pro, a one-off A$39 upgrade for both of you. What's included
When to send what
| What | When |
|---|---|
| Save-the-dates | 8 to 12 months before, as soon as the date and venue are booked. Earlier for a destination wedding. |
| Invitations | About 3 months before. |
| RSVP date | 6 to 8 weeks before. That leaves time to chase replies before final numbers are due. |
| RSVP reminder | A week or two before the RSVP date, to anyone who hasn’t replied. |
| Final numbers to the caterer | About 3 weeks before (check your contract). |
What to include
A save-the-date only needs your names, the date and the town. An invitation needs the full picture:
- who’s invited (name everyone, children included, so there’s no confusion)
- the date, time and venue, with the address
- the schedule, if there’s more than one event
- the dress code
- how and by when to RSVP, with meal choices and dietary needs
- answers to the questions guests always ask: parking, kids, gifts, where to stay
Send them from Your Wedding HQ
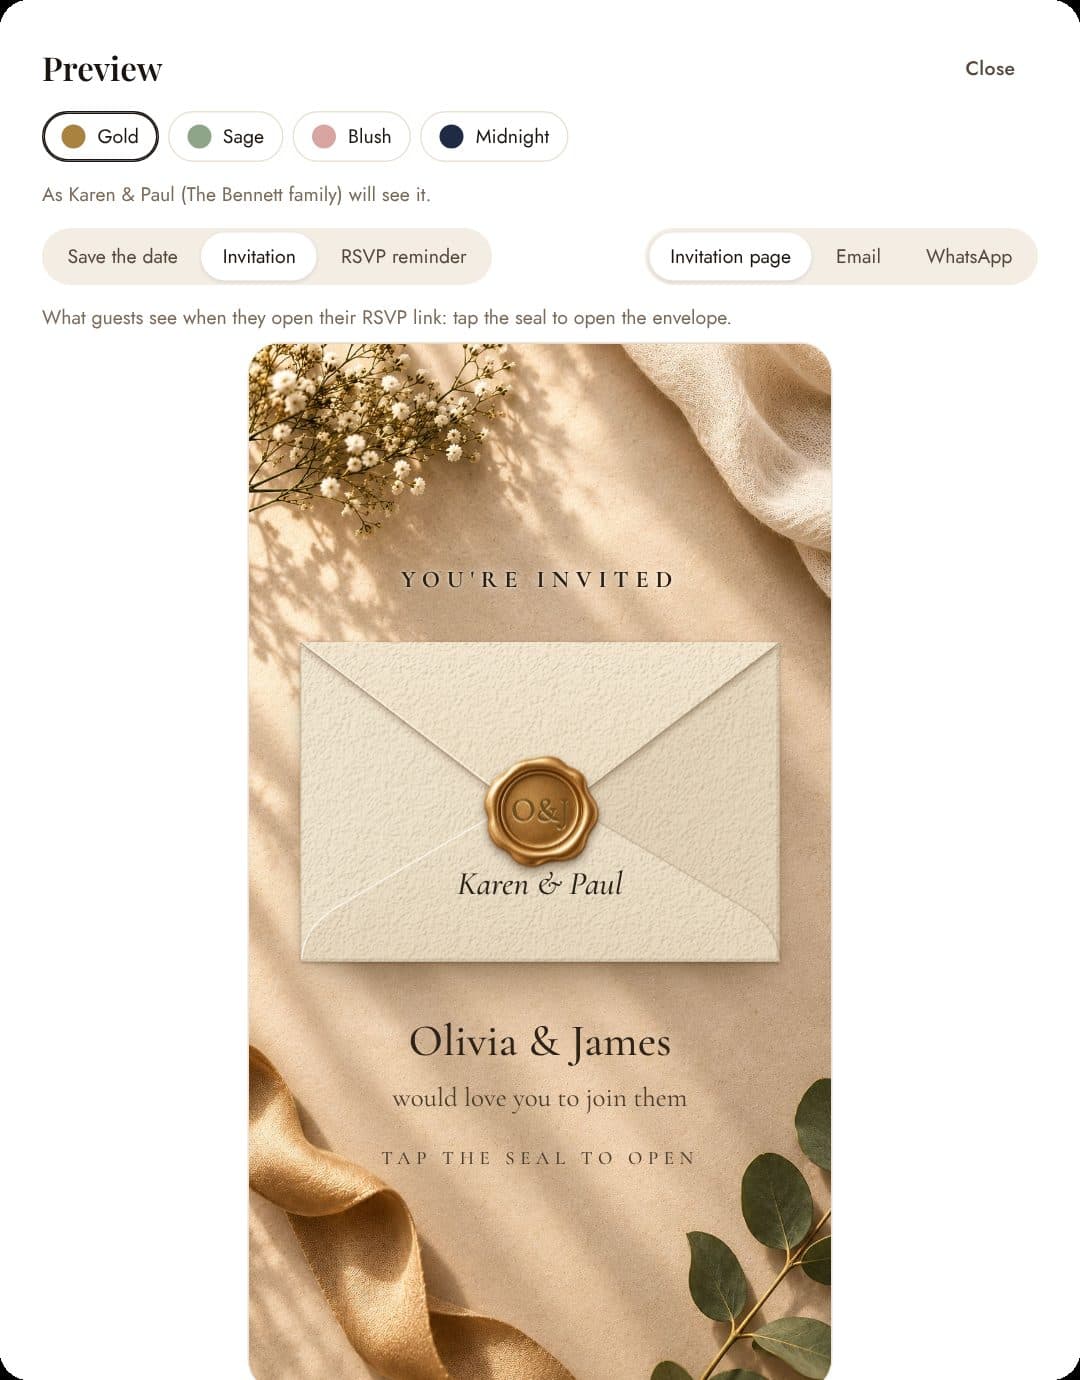
With Wedding HQ Pro, every invite on your guest list gets its own invitation page and RSVP link. Guests open an envelope, tap the seal, and find everything above, with the RSVP at the end.
1. Set up your invitation
Open Guests → Invitation settings and fill in as much as you like. Each part is optional, but do set an RSVP date:
- RSVP by: RSVPs close at the end of this day.
- Colours: gold, sage, blush or midnight, and your own photo.
- A note from you two, shown in the email and at the top of the invitation.
- Venue address: guests get a Directions button that opens their maps app.
- Dress code, with a tip for guests.
- Meal choices: guests who are coming pick one.
- Events such as the ceremony, reception or a recovery brunch, each with a date, time and place. You choose which invites are asked to each one.
- Questions guests ask, plus sections for a photo gallery, gifts or a registry, where to stay, and an optional song request.
Choose Preview the invitation to see the page, the email and the WhatsApp message before anything goes out.
2. Send them
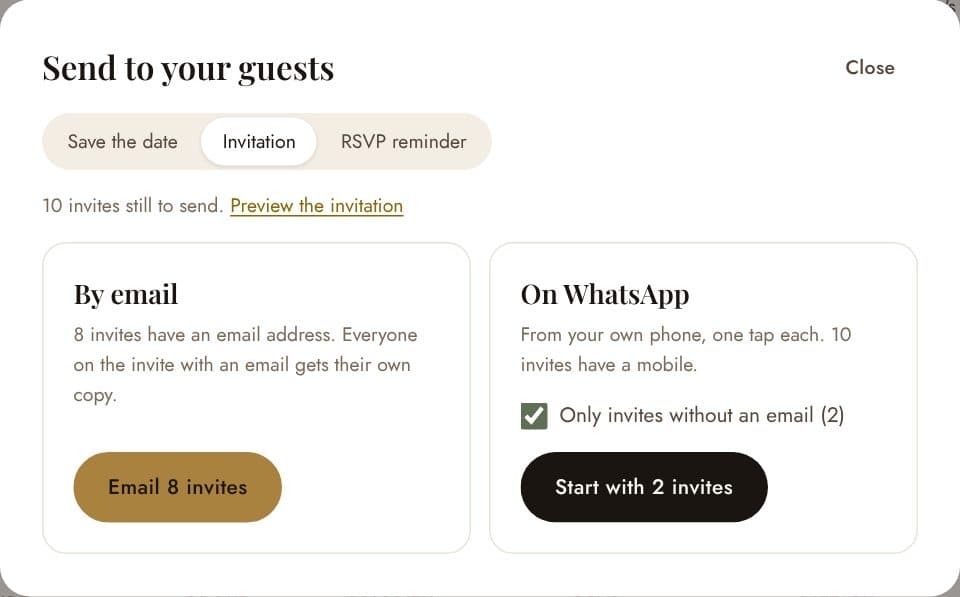
- Choose Send invites on the Guests tab, then pick a save-the-date, an invitation or an RSVP reminder.
- By email: everyone on an invite with an email address gets their own copy, each with that invite’s RSVP link. Keep the window open while it sends.
- On WhatsApp: for guests with a mobile, WhatsApp opens on your phone with the message ready. Send it, come back, and move on to the next one. You can limit this to invites without an email.
Invites that have already had that message are left out, so it’s safe to come back and send to guests you add later. Reminders only go to invites that got an invitation and haven’t replied. Need to send a link another way? Copy any invite’s RSVP link from the guest list.
3. Watch the replies come in
Each invite on your guest list shows where it’s up to: sent (by email or WhatsApp), opened, or replied, with the date. When a guest replies, they answer for everyone on their invite: who’s coming, to which events, their meal and dietary needs, plus a song request and a note for you if you’ve asked. It all lands straight in your guest list, and the totals update.
After your RSVP date, the form closes and guests are asked to contact you directly. Send an RSVP reminder a week or two before then to anyone you’re still waiting on.
Plan it together in Your Wedding HQ
Start free with the checklist, budget, guest list and run of the day. Upgrade to Wedding HQ Pro whenever you're ready: one payment of A$39 for both of you.